
Art Camp Curriculum
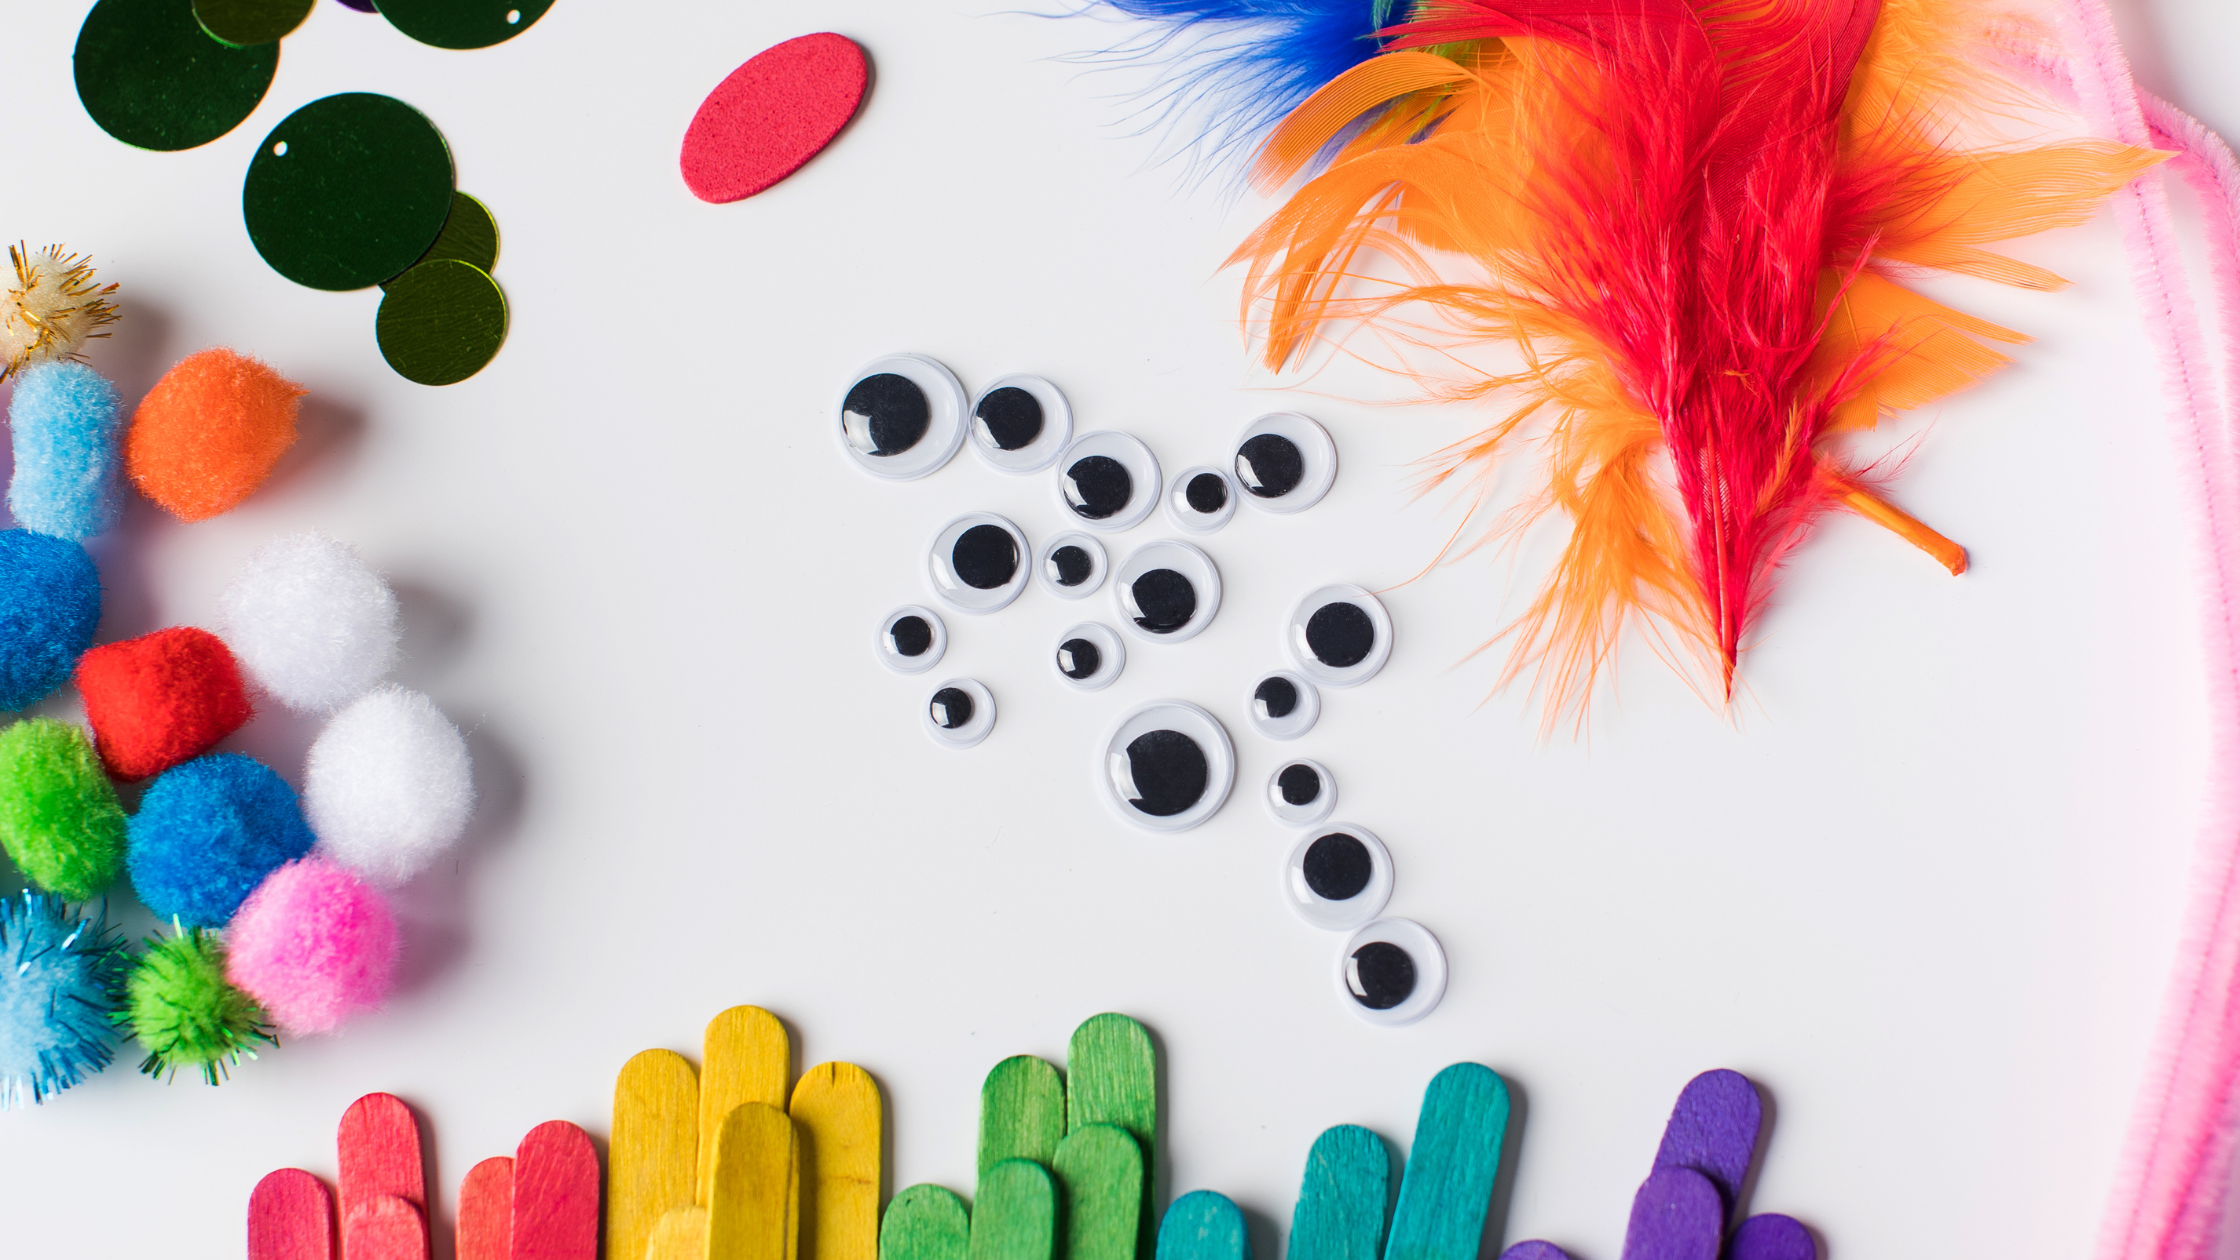
Week at a glance
| Day | Anchor Project | Take-Home | Skill Spotlight |
|---|---|---|---|
| Mon | Stretchy Slime + Decorated Container | Personalized slime in clear jar | Chemistry of polymers, color mixing |
| Tue | Tie-Dye T-Shirt | Wearable shirt (rinsed at home) | Color theory, fabric chemistry |
| Wed | Wild Creature Mask | Wearable painted mask | 3D sculpture, character design |
| Thu | Nature-Print Canvas Tote | Reusable tote + bookmark | Printmaking, pattern, negative space |
| Fri | Clay Treasure Bowl + Charm Necklace + GALLERY DAY | Bowl + necklace + week's full pizza-box gallery | Functional sculpture + jewelry |
Every day pairs an anchor project with a co-activity that finalizes the take-home (decorating the container, painting the mask, adding charms to the necklace) so campers never sit idle and always have something pickup-ready by 11:30 AM.
What progresses across the week
- Scale of creation: liquid (slime) → cloth (tie-dye) → 3D form (mask) → printed surface (tote) → fired-look sculpture + wearable jewelry (clay)
- Take-home utility: something to play with → something to wear → something to wear → something to use → something to keep + something to wear
- Counselor energy needs: high-mess Mon/Tue → high-supervision Wed → medium Thu → calm focus Fri
- Friday is "Gallery Day." Every camper's work from the whole week comes out for a final family-visible mini-show (parents arrive 5 min early for pickup).
Daily photo moment (consistency for parent socials)
Set up the same photo wall every day (one corner of the room with a "GrowFit Art Lab" sign + plain colored backdrop). Take both:
- Individual — camper holding today's take-home, big smile.
- Group — themed daily salute (Mad Scientist Salute on slime day, Tie-Dye Peace Sign on dye day, Animal Roar on mask day, Nature Pose on tote day, Treasure Salute on clay day).
Counselors upload both to a daily folder by 12:15 PM for Russ to push to socials and parent email.
🛡️ Hard safety rules across the week
- Allergies: Confirm any latex (balloons in mask day), wheat (paper mache paste), or skin sensitivity (dyes, saline activator) at sign-in. Have alternates ready.
- No raw borax at camper stations any day. Monday and Tuesday use pre-mixed school-safe activators only.
- No hot glue at camper stations. Counselor-applied only, on a designated counselor table.
- Gloves available at every project. Required for tie-dye and clay if a camper has skin sensitivity; offered for slime.
- Hand-washing built into every transition (snack break, gallery walk, pickup).
Counselor pre-camp checklist (Sunday night before Week 1)
- All material totes inventoried against
ordering-spec.md - Counselor demo of each day's project completed and photographed for the camp room wall
- Photo wall set up + "GrowFit Art Lab" sign printed
- Parent take-home printables (one per project) printed for the full week, divided into daily envelopes
- Allergy/sensitivity list reviewed; alternate-recipe ingredients shelved separately and labeled
📅 DAY 1 — MONDAY: Stretchy Slime + Decorated Container ← click to expand
Theme: Mad Scientist Art Lab — Slime Day Wonder Question (read aloud): "Can you turn a runny liquid into a stretchy work of art… using science?" Take-home: Personalized slime in a clear screw-top jar + handwritten "Slime Care Card" Photo moment: Group "Mad Scientist Salute" at the photo wall — both hands raised holding slime up high
🧠 Learning goals & SEL focus
- Science: polymers, chemical reactions, non-Newtonian fluid behavior (kid words: "slime is a giant chain of tiny molecules holding hands")
- Art: color mixing, texture as a design element, customization
- SEL: patience (wait for the slime to come together), choice-making (add-ins), cause-and-effect
🛠️ Materials per camper (group of 16)
Anchor slime build:
- 1 disposable plastic mixing bowl (8 oz)
- 1 wooden craft stick (mixing)
- ½ cup Elmer's white school glue, pre-measured into a labeled squeeze bottle the night before
- ½ tsp baking soda (pre-portioned into mini paper cups)
- 1–2 tsp Elmer's "Magical Liquid" slime activator (school-safe pre-diluted — NOT raw borax, NOT contact lens solution)
- 1 pair nitrile gloves (offered to every camper, required for any kid with skin sensitivity)
Customization add-ins (set out at 2 shared "add-in stations"):
- Liquid food coloring (red / yellow / blue / green) — 1 dropper bottle each per station
- Fine craft glitter (gold / silver / rainbow)
- Foam beads (white + multicolor mix)
- Plastic fishbowl beads (large, brightly colored)
- 1 squeeze bottle of unscented body lotion (extra stretchy — counselor adds on request)
Take-home + decoration:
- 1 clear 4-oz plastic jar with screw-on lid (per camper)
- 1 vinyl sticker sheet (themed: science / animals / space — kid-pick)
- Permanent fine-tip markers (assorted colors, shared)
- 1 printed "Slime Care Card" (parent take-home printable)
Counselor / shared:
- Plastic tablecloth on every table (toss at end)
- Paper towels (1 full roll per table)
- 1 spray bottle of all-purpose cleaner + microfiber cloths for cleanup
- Hand-washing station or wipes at the door
- 3 "demo slimes" pre-made the night before to set the quality bar
- "GrowFit Art Lab" photo wall sign
Reusable (kept in the camp tote between sessions): measuring spoons, the activator bottle itself, the demo-slime tray
⏰ Schedule
9:00 – 9:15 | Welcome + Theme Hype + Wonder Question (15 min)
- Counselors greet at the door with high-fives; campers find their named tablecloth spot.
- Counselor hype (read aloud, energy high):
"Welcome to the GrowFit Art Lab! Today we are MAD SCIENTIST ARTISTS. We're going to take glue — yeah, glue — and turn it into something stretchy, sparkly, and 100% YOU. We're using real science. Are you ready to mix some molecules?"
- Wonder Question:
"Can you turn a runny liquid into a stretchy work of art… using science?"
- Quick demo: hold up a finished demo slime — stretch it across the table. "By 11:30 every one of you will have one of these in YOUR colors."
- Safety contract (60 sec, every camper repeats): "Slime stays in the bowl. Hands stay out of mouths. Hands stay out of eyes. Wash before snack."
9:15 – 9:35 | Warm-up: Texture Treasure Hunt (20 min)
Sets up "what kind of slime do YOU want to make" before the build starts.
- Set out 8 sensory trays around the room: dry rice, water in a bowl, kinetic sand, plain Jell-O, cotton balls, ice cubes, a sample slime, play-dough.
- Each camper gets a Texture Word Card (printable — list: gooey, smooth, lumpy, squishy, stretchy, cold, sticky, fluffy).
- Campers rotate every 90 seconds. At each tray they circle the words that match.
- Counselor calls out cues: "Smoosh it! Stretch it! Now compare!"
- Wrap: "Now you know what textures EXIST. Today YOUR job is to invent the texture you want your slime to have."
9:35 – 10:15 | Anchor Project Part 1: Build the Base Slime (40 min)
- Counselor demonstrates the build at a center table while all campers watch (5 min).
- The build (each camper at their own bowl):
- Squeeze pre-measured glue into the bowl.
- Add baking soda. Stir until smooth.
- Add activator one drop at a time while stirring. Stop adding when the slime pulls cleanly off the sides of the bowl.
- Knead with hands (gloves optional) until smooth and stretchy — 2–3 minutes.
- Counselors circulate constantly. Cue: "Too sticky? One more drop. Too rubbery? Squish in some lotion." Bring a counselor over for any add-of-activator past drop #3.
- Younger camper (6–7) tip: counselor pre-mixes glue + baking soda; camper only adds activator + kneads.
- Older camper (8–9) stretch: measure their own glue from a master bottle; calculate ratio of activator drops.
10:15 – 10:30 | Snack + Brain-Break: Slime Charades (15 min)
- All campers wash hands before snack (safety re-set).
- Snack at tables (provided by site).
- During snack: counselor calls out things made of slime — octopus, jellyfish, melting ice cream, the gunk in your kitchen sink, the slime monster under your bed — campers shout-act them in their seats. Pure energy reset.
10:30 – 11:00 | Anchor Project Part 2: Customize & Stretch Test (30 min)
- Each camper visits the add-in stations (2 stations, 8 kids per rotation, 4 min each).
- Each camper picks 2 add-ins, kneads them into their slime.
- Stretch Challenge at every table: lay a measuring tape down. "How far can your slime stretch without breaking?" Counselor logs each camper's best stretch on a whiteboard ("Sam — 38 inches!"). No winners, just the wall of records.
- Counselors continue to add activator drops as needed for any slimes that got too sticky from add-ins.
11:00 – 11:30 | Co-Activity: Decorate Your Take-Home Jar (30 min)
This is the take-home prep. Calmer focus after the high-energy stretch challenge.
- Each camper gets their clear 4-oz jar.
- Decorate with stickers + permanent markers. Encourage: "Write your slime's NAME on the jar. What is it called?"
- On the Slime Care Card (printable), camper writes:
- My name: ____________
- My slime's name: ____________
- I added: ____________
- Today I learned: ____________ (counselor prompt: "what's a polymer?")
- Counselor places jar + filled card in named pickup bag.
11:30 – 11:45 | Gallery Walk + Camper Share + Photo Moment (15 min)
- All campers stand behind their decorated jar.
- Walk past every camper's spot in a single loop, counselors leading the clap.
- Each camper says one sentence: "Hi, I'm ___. My slime is called ___ because ___."
- Photo moment (counselors line everyone up at the photo wall):
- Individual: each camper holds their jar at chin level — chest-up portrait.
- Group: "MAD SCIENTIST SALUTE!" — both hands up, slime stretched between them. Counselor counts to 3. Take 3 shots.
11:45 – 12:00 | Clean-up Game + Pack Take-Home + Goodbye Cheer (15 min)
- "Sticky Hands Race": pairs race to (a) toss disposables in the trash bag at their table, (b) wipe their tablecloth-spot with a paper towel, (c) put the wrapped tablecloth in the big trash bag. First pair done = goofy victory cheer.
- All take-home bags lined up by the door (named).
- Goodbye cheer (whole group): "Mad Scientists — DIS-MISSED! See you tomorrow!"
💬 Counselor tips
- The night before: pre-measure glue into squeeze bottles, baking soda into mini cups. Save 15 min of camp-day chaos.
- Make 3 demo slimes the night before so campers can see the quality bar at 9:05 AM.
- Saline-sensitive kid? Use the cornstarch alternative recipe (1/2 cup cornstarch + 1/4 cup warm water + 1 tsp clear dish soap — same kneading flow, slightly stickier result). Pre-warn the parent at sign-in.
- Slime too sticky? One more drop of activator at a time. Sticky usually = not enough activator OR added too many wet add-ins.
- Slime too rubbery? Knead in a pump of unscented lotion.
- Bowl-tipping risk: put a folded paper towel under every bowl as a non-slip mat.
- Energy management: the build (40 min) is the focus block. If you sense camper energy crashing, throw a "freeze!" callout and have everyone hold their slime over their head for 5 seconds. Resets focus.
- Slime-on-clothes: treat with vinegar before washing — write this on the parent take-home card.
🛟 Safety call-out (read at start, repeat at snack)
- Slime stays in the bowl, on the table, or in your hands — never near your face.
- No tasting science. Slime is not food.
- Wash hands before snack. Wash hands before pickup.
- Gloves are available — ask any time.
- If anything stings your skin or gets in your eye, tell a counselor IMMEDIATELY. Counselor walks them to the wash station.
🎯 Parent take-home card content (printed, sent home in jar bag)
Your camper made slime today! Today's science: slime is a polymer — a long chain of molecules linked together. The activator made the chains "hold hands." Care tips: Store in the jar with the lid on. If it dries out, knead in a few drops of warm water. If it sticks to fabric, soak in white vinegar before washing. Tomorrow: Tie-Dye Day — please send your camper in clothes that can get dye on them, or a plain white shirt for them to dye if they prefer!
📅 DAY 2 — TUESDAY: Tie-Dye T-Shirt + Color Lab ← click to expand
Theme: Color Chemistry Lab — Tie-Dye Day Wonder Question: "How do two colors mixing on cloth make a brand-new color you've never seen before?" Take-home: Tied + dyed t-shirt sealed in plastic bag (parents rinse at home that evening), bonus tie-dye wristband, "Tie-Dye Recipe Card" Photo moment: Group "Tie-Dye Peace Sign" — wrapped t-shirt held in one hand, peace sign in the other
🧠 Learning goals & SEL focus
- Science: primary vs. secondary colors, dye absorption into cotton fibers, what a chemical bond is in kid words ("the dye marries the cotton")
- Art: color theory, pattern design (spiral / bullseye / stripes / scrunch), planning vs. surprise
- SEL: patience (you don't see the final reveal until tomorrow at home), choice-making, comfort with not-knowing
🛠️ Materials per camper (group of 16)
Anchor — Tie-Dye T-Shirt:
- 1 plain white 100% cotton t-shirt (kid size, white) — Gildan or similar, pre-washed
- Tulip One-Step Tie Dye kit — pre-mixed bottles with built-in soda ash (no separate soaking). 4 colors per table minimum (red, yellow, blue, green). 1 kit covers ~12 shirts; buy 2 kits per session of 16 for color depth.
- 4 rubber bands per camper
- 1 pair nitrile or latex-free gloves (REQUIRED — no opt-out)
- 1 gallon-size resealable plastic bag (for wet shirt to go home in)
- 1 printed take-home label sticker (camper name + "Wait 6–8 hours, then rinse cold until water runs clear, then wash separately the first time")
Bonus — Tie-Dye Wristband:
- 1 scrap of white cotton (~6"×1.5") per camper
- 2 extra rubber bands per camper
Warm-up — Color Lab:
- Set up 1 shared "Color Mixing Bar" station: 6 clear plastic cups, 3 dropper bottles (red / yellow / blue food coloring), water pitcher, paper towels
- 1 printed Color Mixing worksheet per camper
Take-home + co-activity:
- Permanent fine-tip markers (assorted, shared)
- Plain white paper "Tie-Dye Recipe Card" (printable) — campers record colors + pattern they chose
Counselor / shared:
- Heavy-duty plastic tablecloths (mandatory — dye is permanent)
- Drop cloths or plastic sheeting on the floor under tables
- Spray bottle of water (slightly dampening shirts before dyeing — helps absorption)
- 1 wash station with soap + paper towels at the door
- Trash bag for stained paper towels + tablecloth
- 3 pre-dyed demo shirts (counselor-made the night before)
- "GrowFit Art Lab" photo wall
⏰ Schedule
9:00 – 9:15 | Welcome + Theme Hype + Wonder Question (15 min)
- Greet campers; remind them about clothes — anyone in a non-dye-friendly outfit gets a counselor smock.
- Counselor hype:
"Yesterday we mixed glue and made slime. Today we mix COLOR and make CLOTHING. By the end of today, you will have designed a t-shirt that no one else in the world owns. Not in this room. Not in this state. Not on the planet. It is YOURS."
- Wonder Question: "How do two colors mixing on cloth make a brand-new color you've never seen before?"
- Show 3 demo shirts. "These are mine. Yours are going to be even cooler because YOU pick the colors."
- Safety contract: gloves go on before dye touches anything. Dye stains skin for a week. No exceptions.
9:15 – 9:35 | Warm-up: Color Mixing Bar (20 min)
Before campers ever touch real dye, they learn what color mixing actually does.
- Each camper gets a Color Mixing worksheet and rotates through the Color Mixing Bar in pairs (~3 min per pair).
- At the bar: half-fill 2 cups with water, drop in 2 different food colors with droppers, swirl, predict the result, then check.
- Worksheet has 6 blank circles labeled "Red + Yellow = ___", "Blue + Yellow = ___", etc. Campers fill in the answer with crayon/marker.
- Counselor cue: "These are the SAME color rules your dye is going to follow on your shirt. If you put red and yellow next to each other on the shirt, what color shows up where they touch?"
- Younger camper (6–7) tip: counselor does the dropping; camper predicts and colors in the answer.
- Older camper (8–9) stretch: add a "tertiary" row (e.g. red+purple, yellow+green) to the worksheet.
9:35 – 10:15 | Anchor Part 1: Fold, Band & Apply First Dye (40 min)
- Counselor demos 3 folding patterns at the front table (5 min): Spiral (pinch center, twist), Bullseye (pull a center point, band it down in stripes), Scrunch (crumple into a ball, band loosely).
- Each camper picks ONE pattern, folds + bands their shirt.
- Lightly mist the shirt with water (helps dye penetrate).
- Gloves ON.
- Apply first dye colors. Squeeze bottles directly onto the fabric in the chosen pattern. Counselor coaches: "Less is more — saturate the spot, then move on. Don't drown the shirt."
- Counselor management: monitor every camper. Most common mistake = using too much dye OR putting every color everywhere. Counselor cue: "Look at your color wheel — does that combo work?"
10:15 – 10:30 | Snack + Brain-Break: Color Tag (15 min)
- All campers wash hands (gloves off into trash, wash with soap).
- Snack at tables.
- Brain-break game: counselor calls a color. Anyone wearing that color stands up and does the dance move ("color tag"). Add color combos for a stretch: "Anyone wearing BOTH blue AND yellow!" Pure energy reset, ties back to color theme.
10:30 – 11:00 | Anchor Part 2: Second Dye Pass + Wristband (30 min)
- Campers return to shirts (already starting to bleed beautifully).
- Optional second dye pass: add a complementary color in any white spaces. Counselor pre-approves the combo. ("That's already 4 colors — let's leave room for the dye to mix on its own. White spots are PART of tie-dye.")
- Bonus wristband build: twist the cotton scrap, band it, apply 1–2 dye colors. Bag separately.
- When done: shirt goes into the gallon-size plastic bag, air squeezed out, sealed. Label sticker applied with camper's name + rinse instructions.
- Photo opportunity: counselors take an in-progress "wet bag held up high" shot.
11:00 – 11:30 | Co-Activity: Tie-Dye Recipe Card + Pattern Drawing (30 min)
This is the parent-facing keepsake. The shirt itself isn't fully revealed until tomorrow morning at home.
- Each camper fills out a Tie-Dye Recipe Card:
- My name: ____________
- Pattern I made: ☐ Spiral ☐ Bullseye ☐ Scrunch ☐ My own: ____
- Colors I used: ____________
- I predict it will look like: (draw a sketch in the box)
- What I learned today: ____________
- Card goes in the take-home bag with the shirt.
- Younger camper (6–7): counselor scribes; camper draws.
- Older camper (8–9): add ratio question — "If you used more red than blue, what color do you think wins?"
11:30 – 11:45 | Gallery Walk + Camper Share + Photo Moment (15 min)
- All campers stand by their wrapped bag.
- One-sentence share: "My shirt has ___ pattern and I used ___, ___, and ___."
- Photo wall:
- Individual: camper holds bag chest-height + peace sign with the other hand.
- Group: "TIE-DYE PEACE SIGN!" — everyone peace-signs at the camera. 3 shots.
11:45 – 12:00 | Clean-up Game + Pack Take-Home + Goodbye Cheer (15 min)
- "Toss It Tournament": balled-up gloves into the trash bag, baseball-style. Loudest celebration wins. (Then counselor wipes everything for real.)
- Tablecloths rolled into the big trash bag (be careful — dye is everywhere).
- Take-home bags lined up at the door (wristband bag clipped to shirt bag with a clothespin so they don't separate).
- Goodbye cheer: "Tie-Dye Artists — DIS-MISSED! Show your shirt to your parents tomorrow morning!"
💬 Counselor tips
- The night before: pre-dye 3 demo shirts so kids see "the bar." Bag them and re-open Tuesday morning to show the dramatic reveal.
- Pre-wash all shirts. New cotton has a starch coating that resists dye.
- Dampen shirts with a spray bottle before dyeing — not soaking, just damp. Dye spreads better.
- Tablecloth EVERY surface the shirt might touch. Dye is permanent on countertops, carpet, clothing.
- Two-color rule for younger campers: offer only 2 dye bottles per kid at the start. Add a 3rd if they handled the first two well.
- The "less is more" rule: beginner mistake is to drench the shirt. White spots are GOOD — they're where the design lives.
- Bag right away. Dye keeps reacting in the bag for 6–8 hours; that's the chemistry doing its job overnight.
- Send detailed parent rinse instructions. A parent who rinses too soon ruins the shirt. A parent who follows the card thinks you're a magician.
🛟 Safety call-out
- Gloves stay on the entire time dye is on the table. No exceptions.
- Dye is permanent on skin (~1 week) and on clothing. Counselor smock for any camper not in dye-friendly clothes.
- No splashing. No spraying at each other. Dye out of eyes — if it gets in, wash with cool water immediately and tell a counselor.
- Bag stays SEALED until campers get home. Parents open and rinse.
- Latex allergy: confirm at sign-in. Use nitrile gloves only if needed.
🎯 Parent take-home card content (printed, in the take-home bag)
Your camper made a tie-dye shirt today! DO NOT OPEN THE BAG until tonight. The dye needs 6–8 hours to "marry" the cotton. Tonight (before bed):
- Open the bag outside or over a sink.
- Rinse the shirt under cold water until the water runs clear (5–10 min).
- Wash the shirt alone in cold water on a regular cycle, no detergent the first time.
- Tumble dry low or hang dry.
- Wash separately the next 1–2 washes. Today's science: dye molecules bond to cotton fibers in a chemical reaction called "fiber-reactive dyeing." The bond is permanent — that's why the color stays even after washing. Tomorrow: Animal Mask Day — please bring closed-toed shoes; we'll be working with paint!
📅 DAY 3 — WEDNESDAY: Wild Creature Mask + Creature Card ← click to expand
Theme: Wild Creature Lab — Mask Day Wonder Question: "If you could invent a creature no one has ever seen, what would it look like — and what would it do?" Take-home: Wearable painted plastic animal mask + handwritten "Creature Card" naming + powering their invented creature Photo moment: Group "Wild Creature Roar" — masks on, fiercest creature pose, biggest roar
Why we changed the legacy plan: the old curriculum used balloon-form paper mache, which (a) needs 12+ hours to dry, (b) pops on at least one camper every session, and (c) makes a take-home that's still wet at pickup. This version uses pre-made plastic mask blanks so kids spend the time on the creative part — designing the creature — and the take-home is dry and pickup-ready by 11:30.
🧠 Learning goals & SEL focus
- Art: 3D form, surface decoration, character design (form + color + accessories = personality)
- Imagination: narrative play, character invention, "what does this creature do in the world?"
- SEL: confidence (claiming a creature identity), expressive play, vocabulary expansion through naming
🛠️ Materials per camper (group of 16)
Anchor — Mask:
- 1 plain white plastic kid-mask blank (Discount School Supply or Amazon — variety pack: cat / wolf / fox / owl / bear / generic-half-face)
- Acrylic kids' paint — 6 colors per table (red, yellow, blue, green, black, white) in small dishes/palettes
- 2 brushes per camper (1 wide, 1 fine detail)
- 1 small water cup per camper
- 1 paper towel per camper
Decoration stations (shared, 2 stations):
- Craft feathers (assorted colors)
- Sequins, foam sticker shapes, googly eyes (small + medium)
- Pre-cut craft foam add-ons: ears, horns, snouts, whiskers — kid picks
- Aleene's Tacky Glue in small squeeze bottles (NO HOT GLUE at camper stations — counselor table only)
- 1 small dish of glue per pair of campers
Take-home:
- Elastic string (pre-cut to ~14") + counselor-supervised knot-tying station
- 1 brown paper lunch bag per camper (labeled w/ name) for the mask + card to go home in
- 1 printed "Creature Card" (parent take-home printable)
Counselor / shared:
- Plastic tablecloths
- Hot glue gun ON THE COUNSELOR TABLE ONLY for any heavy 3D add-ons (horns, large foam pieces)
- Hairdryer (helps mask paint speed-dry before decoration phase)
- 3 demo masks pre-made the night before (one realistic, one cartoony, one totally invented — set the "anything goes" tone)
- "GrowFit Art Lab" photo wall
⏰ Schedule
9:00 – 9:15 | Welcome + Theme Hype + Wonder Question (15 min)
- Greet campers; "Yesterday we made shirts. Today we make CREATURES."
- Counselor hype:
"Every artist who ever made a movie, designed a Halloween costume, or drew a video-game character started here: picking a creature and giving it a name, a face, and a power. Today YOU are that artist. By 11:30 you'll have a creature no one has ever seen before."
- Wonder Question: "If you could invent a creature no one has ever seen, what would it look like — and what would it do?"
- Show 3 demo masks. Crucially: ONE realistic (e.g. tabby cat), ONE cartoony (rainbow owl), ONE totally invented (3-eyed pizza beast). This unlocks creative permission.
- Safety contract: paint stays on the mask, not on faces or other campers. Glue dries on contact — careful with fingers and hair.
9:15 – 9:35 | Warm-up: Creature Walk (20 min)
Before they touch a mask, they decide WHO their creature is.
- Counselor lays out 8–10 large printed animal cards around the room (wolf, cat, dragon, owl, sea creature, fox, bear, rabbit, alien, dinosaur).
- Campers walk around in 90-sec rotations, acting out the animal's movement and making its sound.
- After all rotations: each camper picks the mask blank that matches the creature they want to invent. (Counselors keep blank stock available — 2 extras of each style in case kids change minds.)
- Counselor question to seal it: "Got your creature? Now think about ONE thing that makes yours different from a regular ___. Different color? Extra eye? Glittery fur? Hold that thought."
- Younger camper (6–7): counselor reads animal name + makes the sound to demo.
- Older camper (8–9) stretch: also write a "creature origin story" line: "My creature comes from ___."
9:35 – 10:15 | Anchor Part 1: Base Paint the Mask (40 min)
- Each camper at their seat with mask + 2 brushes + water cup + palette of paint.
- Step 1 (5 min): counselor demos at the front — start with the BASE COLOR (the color of most of the creature's face). One smooth coat covering the whole mask.
- Step 2 (10 min): campers paint their base coat. Counselors circulate. Cue: "Cover all the white. Streaks are fine — we add detail in a minute."
- Step 3 (5 min): counselors speed-dry with hairdryers on cool setting (each mask 30 sec). Set masks out on tablecloths for cooling.
- Step 4 (20 min): add details — spots, stripes, eye markings, second-color accents. Counselor cue: "Look at your wonder question. What makes YOUR creature different?"
10:15 – 10:30 | Snack + Brain-Break: Sound Charades (15 min)
- Hands washed. Masks left to fully dry on tables.
- Snack at tables (separate area from drying masks if possible).
- Brain break: counselor whispers an animal in one camper's ear; they make ONLY the sound; rest of the group guesses. Goofy + ties to today's theme. 5–6 rounds.
10:30 – 11:00 | Anchor Part 2: Decorate + 3D Add-Ons (30 min)
This is the "wow" phase. Painted base is dry; now the creature gets its personality.
- Campers visit a decoration station in groups of 8 (rotate every 4 min). Pick: feathers, sequins, googly eyes, foam shapes, foam add-ons (ears/horns/snouts/whiskers).
- Each camper picks 3–5 add-ons (counselor enforces the limit so they don't drown the mask).
- Glue with Aleene's Tacky Glue at their seat (drying on contact within a minute).
- Counselor hot-glue table: any large 3D piece (foam horns, large ears) — kid brings it to the counselor, counselor hot-glues, hands back. NEVER hot glue at camper stations.
11:00 – 11:30 | Co-Activity: Creature Card + String the Mask (30 min)
- Each camper fills out a "Creature Card":
- My creature's NAME: ____________
- It says: ____________ (the sound)
- Its superpower is: ____________
- It eats: ____________
- It lives in: ____________
- My name (the artist): ____________
- While they write, counselors visit each station to string the elastic through the pre-punched holes on the mask. (Knot tied by counselor, NOT camper — adjust to camper's head, double-knot.)
- Card + strung mask placed in named brown bag.
- Younger camper (6–7): counselor scribes; camper says the answer and draws their creature on the back.
- Older camper (8–9) stretch: write 2 sentences about a "day in the life" of their creature on the back.
11:30 – 11:45 | Gallery Walk + Camper Share + Photo Moment (15 min)
- Mask reveal: every camper puts their mask ON together on counselor's count of 3.
- Walk past every camper in a single loop.
- One-sentence share IN CHARACTER as their creature: "I am ___ and I ___!"
- Photo wall:
- Individual: camper wearing the mask, fiercest pose.
- Group: "WILD CREATURE ROAR!" — masks on, biggest roar, claws/paws up. 3 shots.
11:45 – 12:00 | Clean-up Game + Pack Take-Home + Goodbye Cheer (15 min)
- "Brush Race": pairs race to rinse and dry their brushes, dump their water cup, ball up their paper towel, and toss it in the bag.
- All masks back in the brown bags (carefully — pieces might still be tacky).
- Goodbye cheer: "Wild Creatures of GrowFit — DIS-MISSED! Wear those masks for your parents tomorrow!"
💬 Counselor tips
- The night before: make 3 contrasting demo masks (realistic / cartoony / wild-invented). The wild-invented one matters most — it gives kids permission to NOT make a realistic cat.
- Pre-punch elastic holes if your mask blanks don't have them (an awl, on the counselor table, the night before).
- Acrylic paint stains. Smock or apron every camper. Wipe spills immediately.
- Speed-drying matters. A hairdryer on cool between the base coat and the detail phase saves 10 min of waiting.
- Hot glue gun = counselor only. Make this a hard rule that you say out loud at the start. Kids who want big 3D pieces line up at your table.
- The "less is more" rule (round 2): 3–5 add-ons per mask. More than that and the mask looks crowded. You can say "save the rest of your ideas for the back of the Creature Card."
- Allergies: check feather allergies at sign-in (rare but real). Foam-only mode for any camper who needs it.
- The reveal moment matters. Don't let them put masks on early. The countdown-to-3 reveal is the magic.
🛟 Safety call-out
- Paint stays on the mask. No painting faces, hands, or other campers.
- Aleene's Tacky Glue dries fast — careful with fingers, hair, sleeves.
- Hot glue gun is on the COUNSELOR table only. Always.
- Elastic strings are tied by counselors. If a mask feels tight, tell a counselor — we'll adjust.
- Closed-toed shoes today (paint spills).
🎯 Parent take-home card content (printed, in the brown bag)
Your camper invented a CREATURE today! Inside: their painted mask + their "Creature Card." Ask them:
- "What's your creature's name?"
- "What's its superpower?"
- "Show me how it walks." Today's art lesson: character design — using shape, color, and texture to give a creature a personality. Care: acrylic paint is fully cured in 24 hours. Spot-clean only — do not wash. Elastic string is adjustable; ask a parent to re-tie if it's tight. Tomorrow: Nature Print Day — please send your camper in clothes that can get paint on them. We'll be making canvas tote bags!
📅 DAY 4 — THURSDAY: Nature-Print Canvas Tote + Nature Bookmark ← click to expand
Theme: Nature Artist — Print Lab Wonder Question: "What if a leaf could leave a signature on a bag — and you could read its fingerprint forever?" Take-home: Heat-set canvas tote bag with their nature prints + a laminated nature bookmark Photo moment: Group "Nature Pose" — each camper acts as a tree / frog / flower, holding their tote
Why we changed the legacy plan: the old curriculum used plain drawing paper as the surface. Canvas tote bags give kids a durable, reusable take-home with much higher parent-perceived value — and the same printmaking lesson.
🧠 Learning goals & SEL focus
- Art: printmaking, repetition, pattern, negative space
- Science: observation of natural forms — leaf veins, petal symmetry, surface texture
- SEL: patience (you only get one good print per paint coat), care for natural materials, planning before doing
🛠️ Materials per camper (group of 16)
Anchor — Tote Bag:
- 1 plain natural cotton canvas tote bag, kid-size (~12"×14") — Amazon bulk pack
- Tulip Soft Fabric Paint (washable, kid-safe, heat-settable) — 6 colors per table (yellow, green, blue, red, brown, black)
- 1 foam brush + 1 small foam roller per camper
- 2 sponge daubers per table (shared)
- 1 piece of cardboard cut to bag size — slips inside the tote so paint doesn't bleed through
Nature stamps (set out at 2 "Nature Stations"):
- Real leaves, ferns, small flowers — counselor pre-collects morning of camp from a safe spot (or evening before)
- Silk/fabric leaf backups (consistent for printing, no wilting) — Discount School Supply ~$5/bag
- Pinecone halves, small twigs, citrus rind halves (for circle prints) — counselor preps
- 1 plastic tray per station to hold paint puddles for dipping/dabbing
Co-Activity — Nature Bookmark:
- 1 cardstock bookmark blank per camper (2"×7") — counselor pre-cuts night before, hole-punched at top
- 1 piece of 8" ribbon per camper (counselor threads after printing)
- Self-adhesive laminating pouches OR clear contact paper sheets (counselor seals at end)
Take-home + reflection:
- 1 printed "Nature Journal Card" (parent take-home printable)
- 1 brown paper grocery bag per camper (named) for tote + bookmark + card
Counselor / shared:
- Plastic tablecloths
- Hand-washing station / wipes
- Iron + ironing pad for heat-setting fabric paint at the end of camp (COUNSELOR ONLY)
- 3 demo totes pre-made for the quality bar (one organized pattern, one scattered, one nature-scene)
- "GrowFit Art Lab" photo wall
⏰ Schedule
9:00 – 9:15 | Welcome + Theme Hype + Wonder Question (15 min)
- "Yesterday we invented creatures. Today we steal signatures… from nature."
- Counselor hype:
"Every single leaf on every single tree on earth has a different pattern. Your fingerprint? Unique. A leaf's veins? Unique. Today we're going to TAKE that pattern and put it on a bag you'll use for years."
- Wonder Question: "What if a leaf could leave a signature on a bag — and you could read its fingerprint forever?"
- Show 3 demo totes. Pass them around — kids can feel that the print really is dried into the canvas.
- Safety contract: fabric paint stains — table, smock, hands. Brushes stay over the tote, not in the air.
9:15 – 9:35 | Warm-up: Nature Treasure Hunt + Texture Sort (20 min)
Sets up the printmaking choices before any paint touches anything.
- Indoor version (default): counselor lays out 4 trays of nature items + silk backups. Each camper has a "Print Plan Card" with 4 boxes.
- Outdoor version (if site has safe green space): counselor leads a 10-min collecting walk; each camper finds 3 leaves to bring back.
- In both cases, each camper picks 3 nature items they want to print with. They place a rubbing crayon over each item on the Print Plan Card to record the texture.
- Counselor question to seal it: "Look at your three items. Which one will be your repeating pattern? Which one is your 'star'?"
- Younger camper (6–7): counselor narrates the texture words.
- Older camper (8–9) stretch: also identify "positive" (the leaf itself) vs. "negative" (space around it) on their card.
9:35 – 10:15 | Anchor Part 1: First Print Pass on the Tote (40 min)
- Each camper slides the cardboard insert into their tote (prevents bleed-through).
- Counselor demos at the front (5 min):
- Brush paint onto the BACK (textured side) of the leaf — thin, even coat.
- Press leaf paint-side-down onto the tote.
- Press firmly with hand, peel off slowly.
- Move to a new spot. Repeat.
- Campers work for 30 min. Counselors circulate. Cues:
"Less paint, not more. Heavy paint = blob, no detail." "Pause and look at your bag from a step back. Where's the white space?" "What color goes next to your first print?"
10:15 – 10:30 | Snack + Brain-Break: Nature Charades (15 min)
- Hands washed. Totes left to dry flat.
- Snack at tables (away from drying totes).
- Brain break: counselor whispers something in nature (oak tree, butterfly, frog, raindrop, mountain); camper acts it out; group guesses. Goofy, ties to theme.
10:30 – 11:00 | Anchor Part 2: Second Print Pass + Pattern (30 min)
- Campers add a SECOND COLOR or pattern layer over the first. Counselor cues: "What if you printed the same leaf in three different colors going across the bag? What if you made a row?"
- This is where the tote stops looking like a craft and starts looking like art — the second pass adds depth.
- For any camper who over-painted in round 1: counselor helps them add a strong solid stamp (citrus half, pinecone half) over the muddiness to "save" the design.
11:00 – 11:30 | Co-Activity: Nature Bookmark + Journal Card (30 min)
- Counselor hands each camper a bookmark blank. They press a SINGLE small leaf/flower print onto it — clean, simple, framed.
- While bookmarks dry, campers fill out the Nature Journal Card:
- My name: ____________
- Items I printed: ____________
- Color story: ____________
- One thing I noticed about my leaf today: ____________
- Counselor laminates each bookmark (self-adhesive pouch or contact paper), trims edges, threads ribbon through the hole.
11:30 – 11:45 | Heat-Set + Gallery Walk + Camper Share + Photo Moment (15 min)
While campers stand at their tote for the gallery walk, counselor heat-sets the totes one at a time with the iron (cardboard insert protects the back side). Each iron pass = 30 sec.
- Walk past every camper's tote.
- One-sentence share: "My favorite print is the ___ because ___."
- Photo wall:
- Individual: camper holding the tote in front of them like a banner.
- Group: "NATURE POSE!" — each kid picks a nature thing to be (tree = arms up, frog = squat, flower = spin). 3 shots.
11:45 – 12:00 | Clean-up Game + Pack Take-Home + Goodbye Cheer (15 min)
- "Sponge Toss": pairs race to rinse their brushes/rollers, wipe their tablecloth-spot, and toss disposables.
- Heat-set tote + bookmark + journal card go into the brown bag, labeled.
- Goodbye cheer: "Nature Artists — DIS-MISSED! Use that tote at the grocery store!"
💬 Counselor tips
- Collect leaves the morning of camp. Fresh = better print. Have silk backups for any camper whose leaves wilted or tore.
- Avoid weed-killer zones. Public park grass is fine; any lawn that says "do not enter — recently treated" is off-limits for leaf-gathering.
- Variety of textures wins. A maple leaf, a fern, and a flat-bottomed leaf give VERY different prints. Set up the trays so every camper has access to all 3 categories.
- The cardboard insert is non-negotiable. Without it, paint bleeds onto the BACK of the tote and ruins both sides.
- Less paint = better print. First-time printers always over-paint. Cue it constantly.
- Heat-setting MATTERS. Without it, the paint washes out in the laundry. With it, it stays for years. Do every tote.
- The bookmark is the parent-impressive piece. A clean single-leaf print on a laminated bookmark looks like real art. Worth the time.
- Allergies: confirm any plant/pollen sensitivities at sign-in. Switch the camper to silk backups only.
🛟 Safety call-out
- Fabric paint stains. Smocks required.
- Brushes stay over the tote, never waved in the air.
- No eating leaves. No tasting paint. No exceptions.
- The iron is on the COUNSELOR table only. Do not approach the counselor table during heat-setting.
- Hot tote: when a tote comes off the iron, it's hot for 30 seconds. Counselor places it on the camper's table; camper does not touch until counselor says go.
🎯 Parent take-home card content (printed, in the brown bag)
Your camper printed nature today! Inside: a heat-set canvas tote + a laminated nature bookmark + their Nature Journal Card. Today's art lesson: printmaking — using natural objects as repeatable "stamps" to make patterns. Care: the tote is heat-set, so it can be washed on cold, gentle cycle, and air-dried. Don't put it in the dryer (heat can re-soften the paint). The bookmark is laminated and waterproof. A few questions to ask tonight:
- "Which leaf made your favorite print?"
- "What did you notice about your leaf's veins?"
- "What would you print on a tote next time?" Tomorrow is FRIDAY — GALLERY DAY! Bring a parent 5 min early at pickup for a mini-show of everything your camper made this week.
📅 DAY 5 — FRIDAY: Clay Treasure Bowl + Charm Necklace + GALLERY DAY ← click to expand
Theme: Treasure Maker — Functional Art Lab Wonder Question: "If you could make ONE thing that you keep forever — and ONE thing you wear — what would they look like?" Take-home: Air-dry clay treasure bowl + clay charm necklace + the entire week's work (slime jar, tie-dye shirt bag, animal mask, nature tote, today's clay pieces) in a single take-home pizza-box gallery kit Photo moment: Parents arrive at 11:55 for "GALLERY DAY" — group "Treasure Salute" (hand on heart, treasure raised) with parents in attendance
Why Friday is different: parents come 5 minutes early for the mini family gallery walk. This is the week-of-camp culminating moment — counselors set up a tabletop display of every camper's work so families see ALL FIVE projects together at pickup.
🧠 Learning goals & SEL focus
- Art: functional sculpture (the bowl), wearable design (the necklace), texture and pattern in 3D
- Reflection: seeing what they made all week as a body of work — first time they've thought of themselves as an artist with a portfolio
- SEL: pride, presenting to family, looking back on a week of growth, generosity (sharing their work)
🛠️ Materials per camper (group of 16)
Anchor — Treasure Bowl:
- 1 cup (~4 oz) Crayola Model Magic per camper (white or assorted) — lighter, kid-friendlier, and faster-drying than terra-cotta-style air-dry clay
- 1 wax paper square (~12") per camper as a work surface
- 1 small wooden rolling pin OR a smooth round cup per camper
Co-Activity — Clay Charm Necklace:
- Extra Model Magic scraps (uses leftover from bowl-making — zero waste)
- 1 length of waxed cotton cord or hemp string per camper (~22"), pre-cut
- 5–8 wooden or plastic beads per camper to thread between charms
- 1 small dowel/toothpick per camper to poke charm holes BEFORE drying
Texture & decoration stations (2 shared stations):
- Forks, plastic stamps, leaves, lace scraps, plastic combs, small textured fabric pieces, coins
- Acrylic kids' paint (reuse from Wednesday) — 6 colors per table
- Fine + wide brushes
- Small water cups + paper towels
Take-home — Gallery Pizza Box Kit:
- 1 small pizza box per camper (10"–12", clean unused) — sturdy enough to protect the wet bowl
- 1 printed "Treasure Card" + week-summary "Artist Portfolio Card" inside the box
- Counselor stages each camper's full week of work into the box during the morning
Counselor / shared:
- Plastic tablecloths
- Hand-washing station / wipes
- 3 demo bowls + 1 demo necklace pre-made the night before
- A long gallery table set up by 11:30 with ALL of each camper's week-of-work on labeled placemats
- "GrowFit Art Lab" photo wall — extra space for parent photos
- A printed "Welcome, Families!" sign at the door for the 11:55 arrival
⏰ Schedule
9:00 – 9:15 | Welcome + Theme Hype + Wonder Question (15 min)
- "It's Friday! Today we make TREASURE. And — parents are coming early for a gallery, so today's work has to be SHOW-READY."
- Counselor hype:
"Real artists make functional things — bowls you eat from, jewelry you wear. Today we do BOTH. You'll make a treasure bowl to keep your coolest things in, and a charm necklace to wear out the door. And at 11:55 your parents will see EVERYTHING you made this week — all five projects, side by side. Be proud."
- Wonder Question: "If you could make ONE thing that you keep forever — and ONE thing you wear — what would they look like?"
- Show 3 demo bowls + 1 demo necklace. Pass them around.
- Safety contract: clay is not edible. Wash hands before snack. Stay calm — clay is delicate.
9:15 – 9:35 | Warm-up: Texture Studio (20 min)
Lets every camper test what their texture tools do before committing to their bowl design.
- Each camper gets a small scrap of Model Magic (~ping-pong ball size) on their wax paper.
- Counselor lays out the texture tools across the tables.
- Campers experiment: roll, press, stamp. Try 5+ different textures on the scrap. Re-roll and try again.
- Counselor question to seal it: "Which texture is your favorite? You're going to use that one on your bowl."
- Younger camper (6–7): counselor demos how to press firmly (kids tend to barely touch the clay).
- Older camper (8–9) stretch: combine 2 textures in one print.
9:35 – 10:15 | Anchor Part 1: Build the Bowl (40 min)
- Counselor demos at the front (5 min):
- Roll the Model Magic into a smooth ball.
- Flatten with the palm of the hand into a thick disc (~½" thick, 4–5" wide).
- Press the center down with both thumbs to make a shallow well.
- Pinch + shape the edges up into bowl walls. Smooth with damp fingertip if needed.
- Campers build for 25 min. Counselors circulate — biggest help is keeping bowl walls thick enough (thin = cracks while drying).
- Last 5 min: each camper pinches off a small ball of clay (golf-ball sized) from any leftover and sets it aside on their wax paper — this becomes the charm necklace material.
10:15 – 10:30 | Snack + Brain-Break: "Statue" Game (15 min)
- Hands washed (clay is messy, clay is not food).
- Snack at tables.
- Brain break: counselor calls "STATUE!" — every camper freezes in a treasure-themed pose (pirate, queen, wizard, archeologist). Counselor tags a statue; they have to maintain the pose while the next round starts. 5–6 rounds.
10:30 – 11:00 | Anchor Part 2: Texture + Base Paint the Bowl (30 min)
- Campers return to bowls. First 15 min: press textures into the bowl walls and rim. Counselor cue: "Pick your favorite from texture studio. Do it all the way around. Then add one accent."
- Last 15 min: paint a BASE COLOR with acrylic kids' paint. (One coat. They'll add detail layers at home if they want — Model Magic stays paintable for 24+ hrs.) Counselor warns: "Don't drench it. Thin coat. We need this dry enough to travel home in the pizza box."
11:00 – 11:25 | Co-Activity: Clay Charm Necklace (25 min)
Uses the set-aside clay ball from earlier.
- Each camper pinches off 2–3 charms from their reserved clay (each charm pea- to dime-sized — they dry faster).
- Shape each charm: hearts, stars, leaves, initials, mini bowls, animals — kid's choice. Texture with toothpick.
- CRITICAL: poke a hole through the top of each charm with a toothpick before the clay starts to firm up. (No hole = no necklace.)
- Paint a base color on each charm (one quick coat).
- While paint dries (~5 min), camper threads the cord with beads — counselor pre-ties one end so the camper just slides beads on. After paint touch-dry, counselor strings the charms in between beads and ties the second end (necklace closure: simple knotted loop, kid-safe, easy to slip on and off).
11:25 – 11:40 | Gallery Setup + Camper Share + Pizza-Box Pack (15 min)
This is the production sprint before parents arrive. Counselors run staging while campers do reflection.
- Counselors stage the gallery table: every camper has a labeled placemat with all 5 of their take-homes laid out — left to right: slime, tie-dye bag, animal mask, nature tote, today's bowl + necklace.
- Campers fill out the "Artist Portfolio Card":
- My name: ____________
- My favorite project this week: ____________
- What I learned about art: ____________
- One thing I made that I'm proudest of: ____________
- Each camper does a single sentence around the circle: "My favorite this week was ___ because ___."
- Counselors pack each camper's week-of-work INTO the labeled pizza box. Bowl + necklace go on top (still drying). Card goes inside the lid.
- Box is set on the camper's chair, lid open for parents to see during the gallery walk.
11:40 – 11:55 | Pre-Photo + Parents Arrive (15 min)
- At 11:40: counselor lines campers up at the photo wall for a kids-only group shot of the "TREASURE SALUTE" — hand on heart, other hand raising today's necklace. 3 shots, before chaos hits.
- At 11:45: open the door 10 min early. Parents trickle in.
- At 11:55: all parents inside. Counselor calls the room together: "Welcome, families! Take a slow walk around the gallery — every table has your camper's work from the WHOLE week. Ask them about a project. We'll do one group photo before pickup."
- Counselor takes parent-with-camper photos at the gallery wall during the walk.
11:55 – 12:00 | Group Photo + Pack + Goodbye Cheer (5 min)
- Whole-room photo: campers in front, parents behind, "TREASURE SALUTE" on count of 3.
- Campers grab their pizza-box gallery kit (lid carefully closed — bowl is fragile).
- Final goodbye cheer: "GrowFit Art Lab — graduates of the week! See you NEXT camp!"
💬 Counselor tips
- The night before: make 3 demo bowls + 1 demo necklace. Pre-stuff one demo pizza box with mock take-homes so kids see what theirs will look like.
- Thick bowl walls. This is your single biggest job today. Thin walls = cracked bowls = sad campers Monday morning. Walk around with a calipers eye.
- Charm holes BEFORE drying. If a camper finishes a charm without a hole, drill one with a toothpick immediately. Once it starts firming up (~15 min), holes crack the charm.
- Paint is OPTIONAL detail. A textured natural-white Model Magic bowl looks beautiful on its own. Don't push paint on a camper who's done.
- Bowl is NOT fully dry today. Tell parents at pickup: "Your camper's bowl needs to sit on a counter for 2 more days to fully harden. Don't put weight on it until then." Write it on the Treasure Card.
- Gallery staging takes longer than you think. Start staging the gallery table at 11:00 (during the charm activity). One counselor stages while the others run the charm station.
- Parent photo etiquette: ask each parent before snapping their family. Some sites have strict media policies.
- Friday is emotional for some kids (especially first-time campers). Have a "second helping" of clay scrap available for any kid who needs an extra few minutes of calming hands-on time during pickup chaos.
🛟 Safety call-out
- Clay is not food. Wash hands before snack.
- Necklace cord is short and the closure is a kid-easy loop knot — not a slip knot. Cord is also pre-broken-tested for breakaway strength (snaps under hard pull) — but tell kids: necklaces go OVER the head, not pulled over while caught.
- Pizza-box bowls are FRAGILE. Carry the box FLAT with two hands. (Counselors demonstrate at handoff.)
- Allergies: confirm any tactile sensitivities at sign-in. Switch to gloves if needed.
🎯 Parent take-home card content (inside the pizza box lid)
CONGRATS — your camper just finished a full week of GrowFit Art Camp! Inside this box you'll find EVERY project from this week:
- Monday: Slime in a clear jar
- Tuesday: Tie-dye t-shirt (in plastic bag — rinse instructions on the bag)
- Wednesday: Painted wild creature mask + Creature Card
- Thursday: Heat-set canvas nature-print tote bag + nature bookmark
- Friday: Air-dry clay treasure bowl + clay charm necklace Bowl care: The bowl is still drying. Place it on a counter, untouched, for 2 days before adding "treasures." Do not put liquids or food in the bowl — it's decorative. Necklace care: Cord is breakaway-strength for safety. Slip over the head; do not pull while caught. What your camper learned this week: polymers (slime), color theory (tie-dye), 3D form (mask), printmaking (tote), and functional sculpture (bowl) — a full art curriculum, no joke. Sign up for next session at growfitcamp.com!